
Page 12 1986 GasGas Halley restoration
The project to restore this God foresaken 1986 GasGas Halley that had been left for years in a Spaniards garden has been gaining momentum. However with every step forward there has also been a step backwards or at the very least a step sideways.
Delays , delays, deeper problems , me breaking things...the list goes on.Never the less im forging ahead at a fairly good rate of knots.
One of the first things i needed to do was get the alloy welding completed. Although i have a 130 amp Mig welder with the alloy wire and gas i wont fool you by telling you i / it can weld alloy. My welder just tends to lay the wire on top and cacoon the crack or hole underneath.
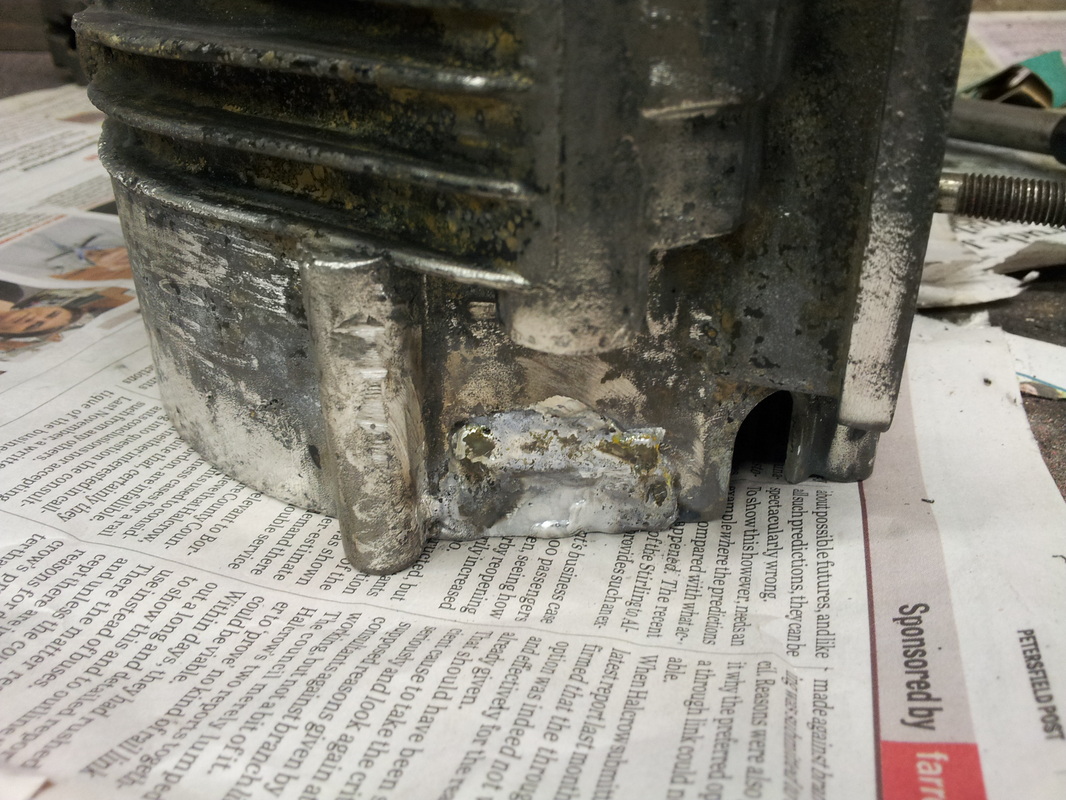
So i collected together the parts i had that needed welding , which included the engine , as you can see below !.
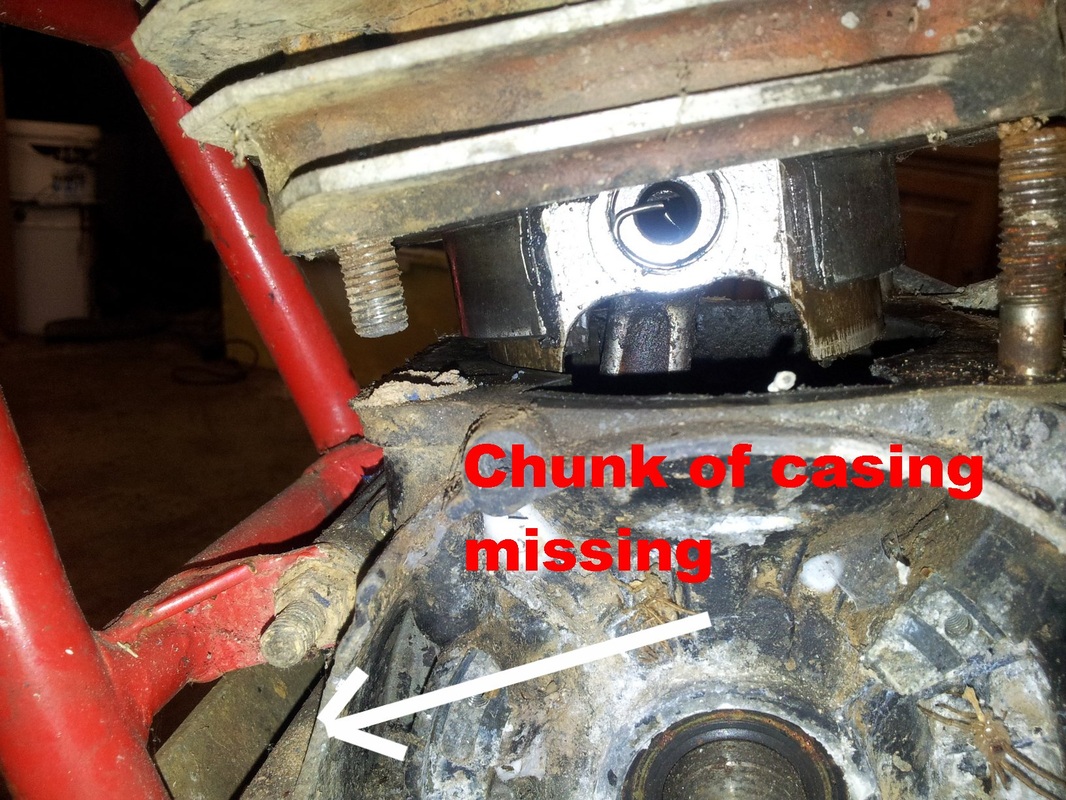
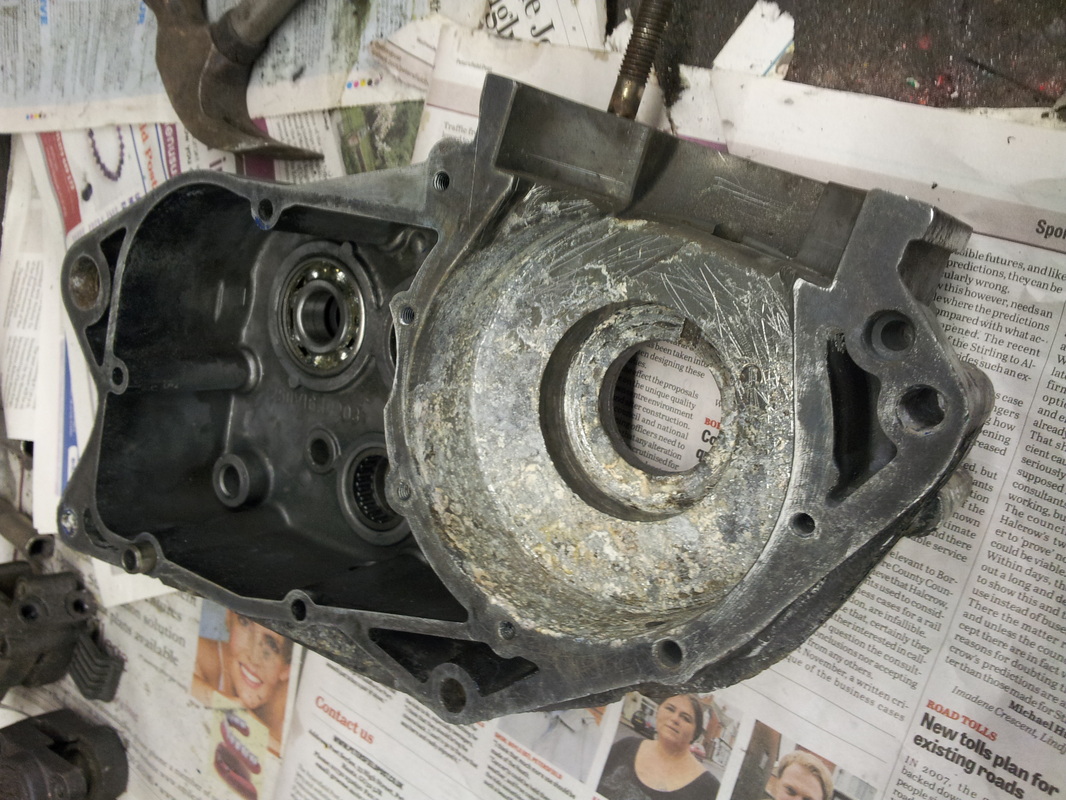
So , the engine had a lump of the housing missing as well as some cracks.
Delays , delays, deeper problems , me breaking things...the list goes on.Never the less im forging ahead at a fairly good rate of knots.
One of the first things i needed to do was get the alloy welding completed. Although i have a 130 amp Mig welder with the alloy wire and gas i wont fool you by telling you i / it can weld alloy. My welder just tends to lay the wire on top and cacoon the crack or hole underneath.
So i collected together the parts i had that needed welding , which included the engine , as you can see below !.
So , the engine had a lump of the housing missing as well as some cracks.
1986 GasGas Halley restoration www.retrotrials.com
|
1986 GasGas Halley restoration www.retrotrials.com
|
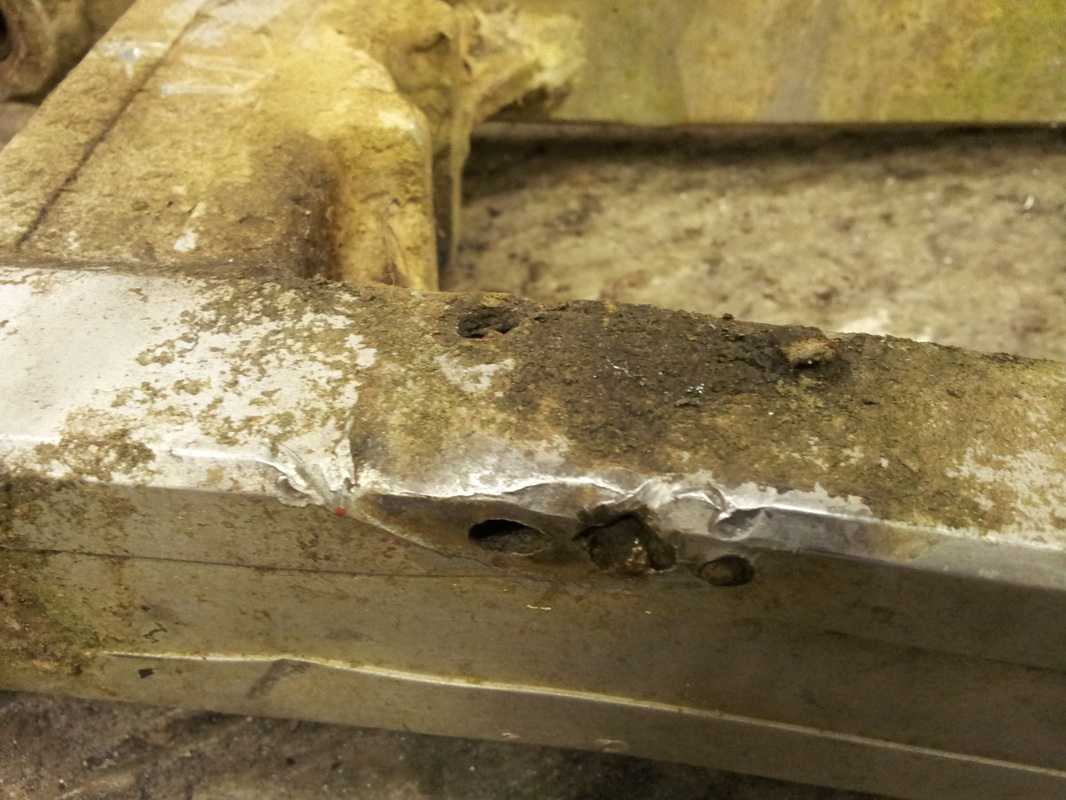
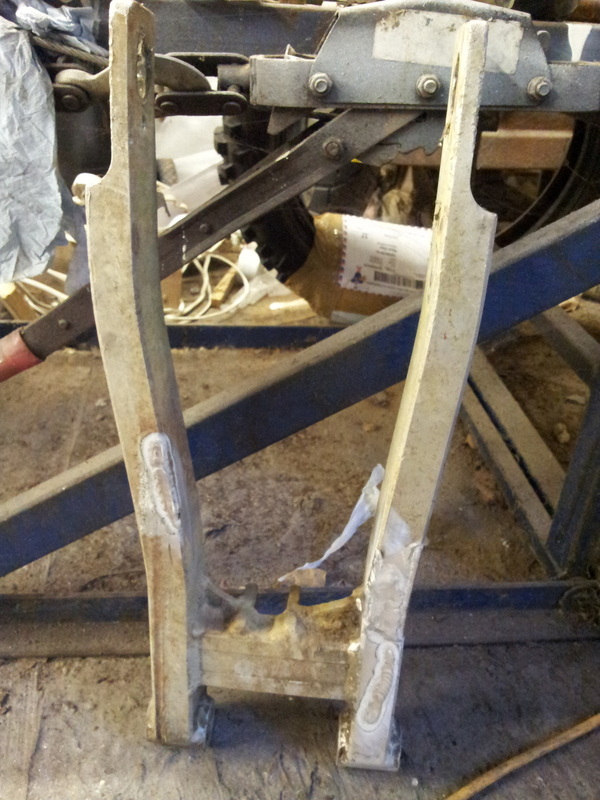
The swinging arm was also cracked and potted .
The swinging arm , just like the sump shield of a bike always tells the true story about a bikes history. The swinging arm of the Halley was in disgussting condition with SEVERAL actual cracks as wells as literally chunks missing.
Also where the side stand had been attached , the holes had been so abused over the years that you couldnt possibly screw a bolt in.
1986 GasGas Halley restoration www.retrotrials.com
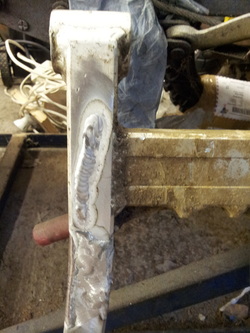
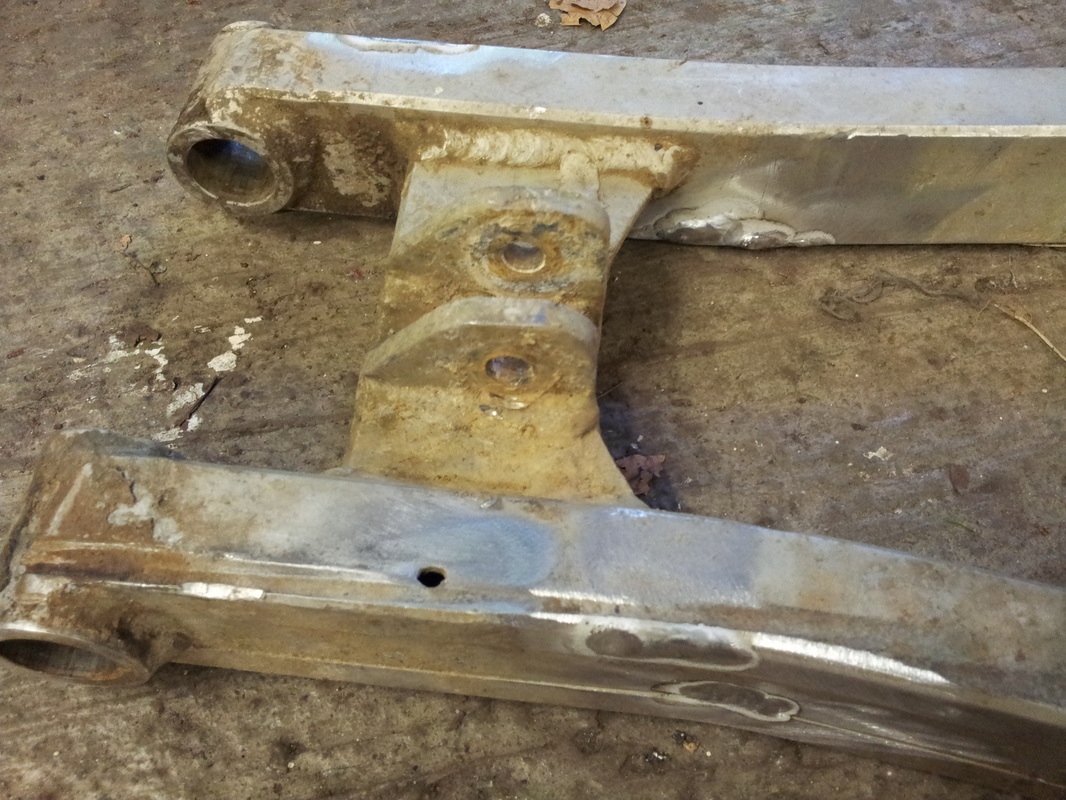
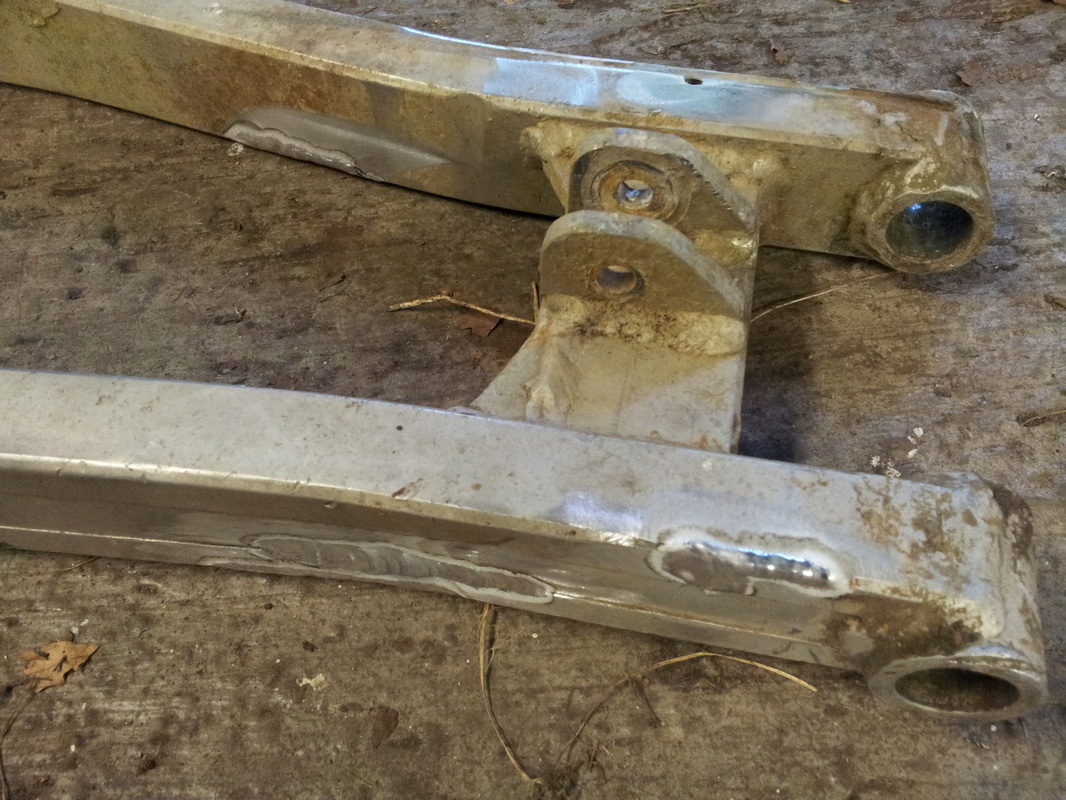
I went to a local welder who , as you can see did the job well. All i needed to do now was dress the welds and finish it off.
1986 GasGas Halley restoration www.retrotrials.com
|
1986 GasGas Halley restoration www.retrotrials.com
|
1986 GasGas Halley restoration www.retrotrials.com
|
1986 GasGas Halley restoration www.retrotrials.com
|
Another worry was the corrosion to the inside of the engine casings. The magnesium / alloy metal was starting to flake and corrode badly so this would need cleaning up really well and any loose material removing. Luckily the bearings and seals would still mount in place well.
1986 GasGas Halley restoration www.retrotrials.com
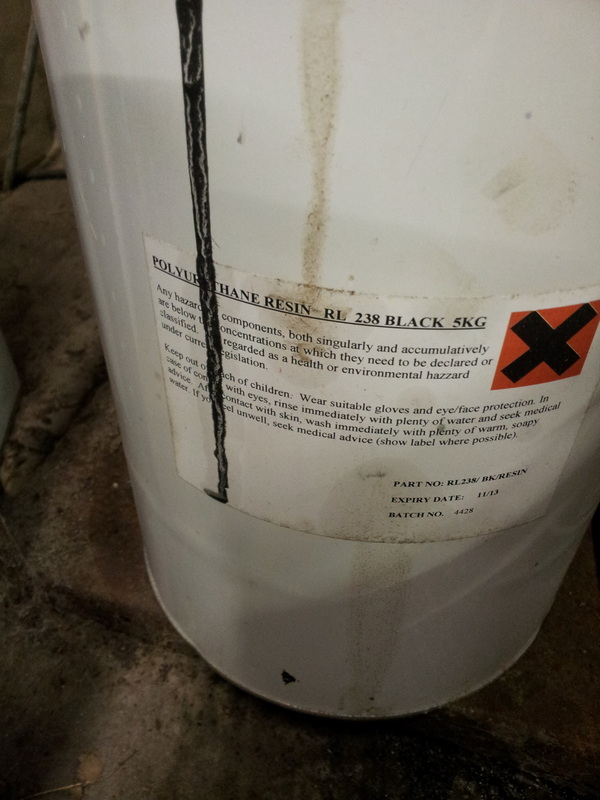
A local firm supplied me with some black gelcoat a while ago .
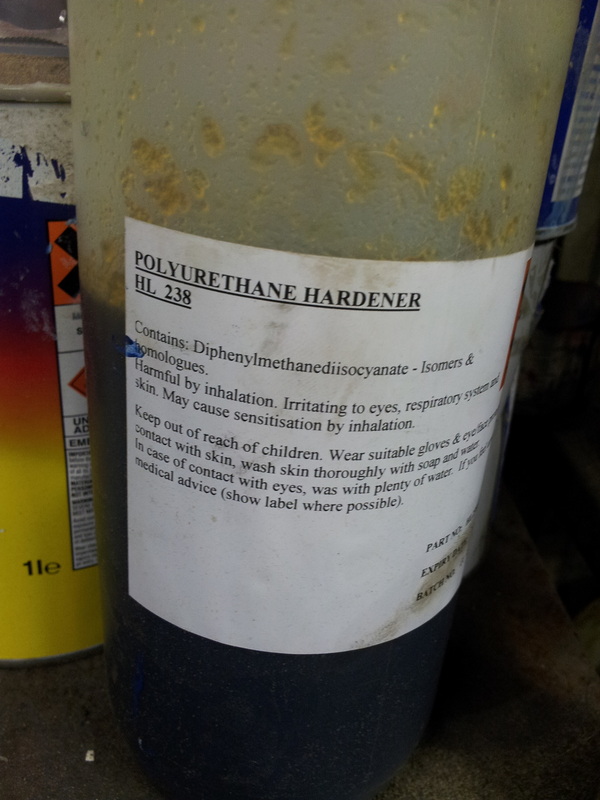
Let me tell you about this stuff. This resin is as you can see if polyurethene based and is completely different from polyester or epoxy resins. It is supposed to harden completely flat and shiny and give a beautiful new skin to an item. The Spanish restorers use the product a lot to make old airboxes appear like new. You just mix and paint this stuff on and in a few hours youve got a brand new product.
I have found that it is very unreliable to work with . On one occasion it will work and the next it will not. I really cant fathom it out.
you have to mix it exactly at a 4 to 1 ratio. To much , or to little hardener and the resin wont go off or it hardens with a haze in the finish.
1986 GasGas Halley restoration www.retrotrials.com
|
1986 GasGas Halley restoration www.retrotrials.com
|
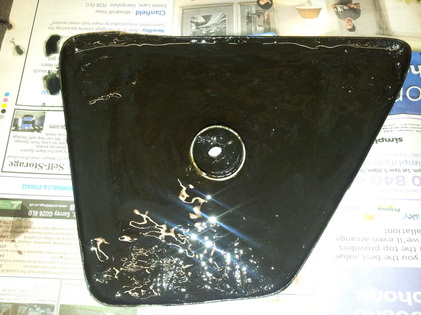
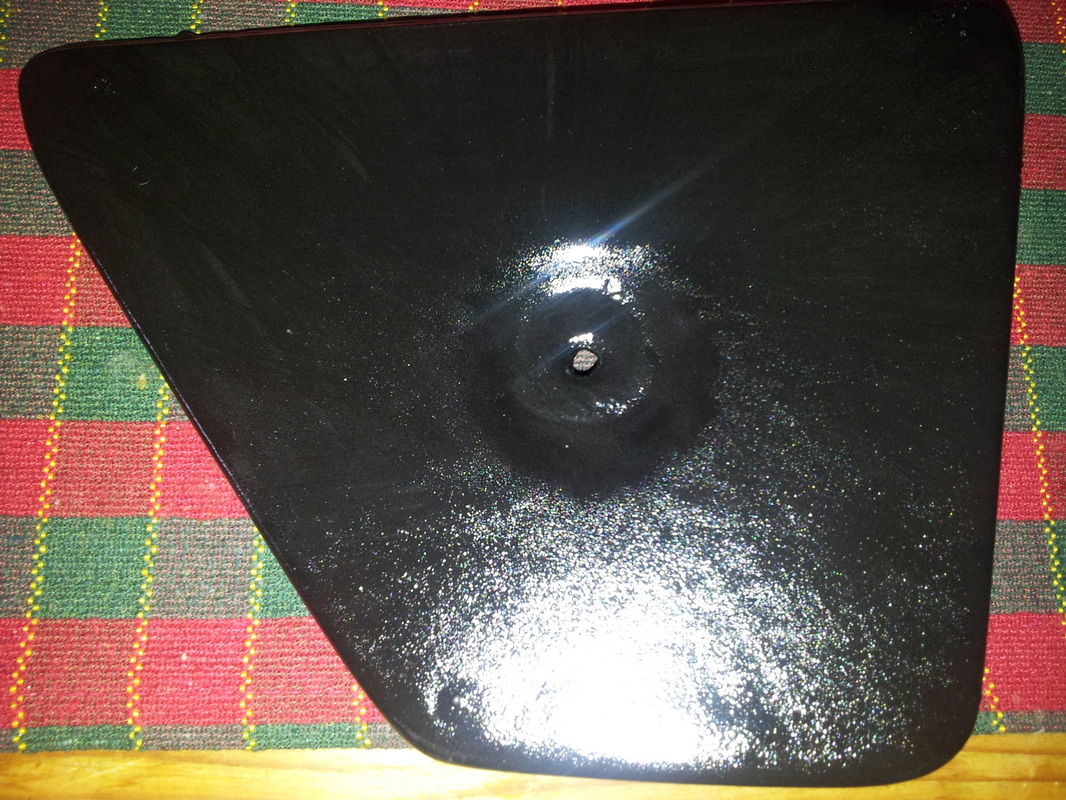
This was my first attempt at using the resin . This is the airbox lid and box.They both came out well.
This was where my luck ended
This was where my luck ended
1986 GasGas Halley restoration www.retrotrials.com
|
1986 GasGas Halley restoration www.retrotrials.com
|
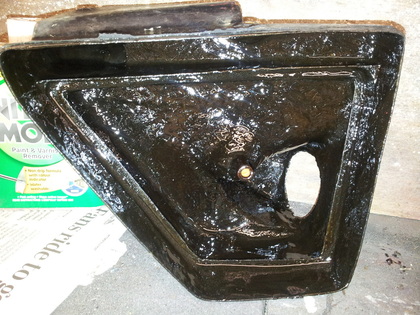
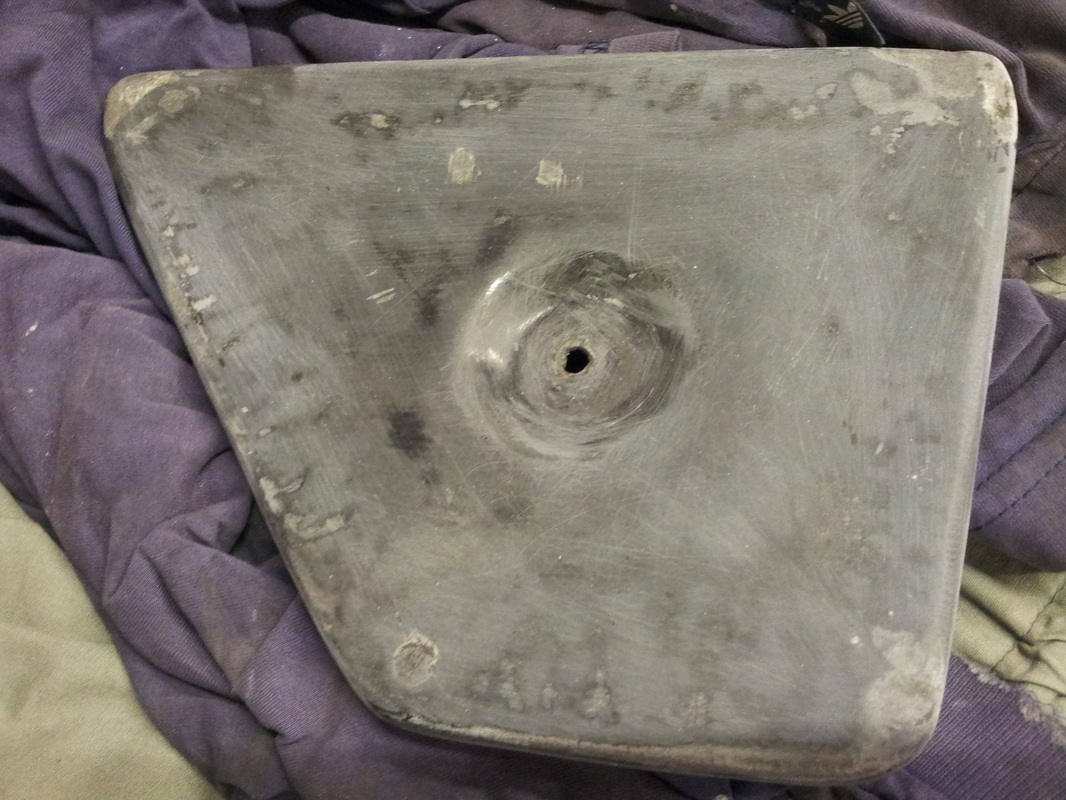
This little puppy below is the flip side of the air box lid. I just cannot get the resin to behave. I have literally applied the resin 3 times to this side of the air box lid and on 2 occasions it dried to this haze. On one occasion it didnt even dry.
The manufacturers tell me my product is out of date , which is true......but i dont buy their story for this result
Below is the latest attempt. It looks ok , but im not happy with it. I want it flat and satin/ gloss.
The manufacturers tell me my product is out of date , which is true......but i dont buy their story for this result
Below is the latest attempt. It looks ok , but im not happy with it. I want it flat and satin/ gloss.
1986 GasGas Halley restoration www.retrotrials.com
So ive got to scrape and sand it off again. What ive decided is to experiment with different quantities of hardener. What im slowly learning is that the 4 to one ratio is rich and for this resin , which is old i need less hardener. So fingers crossed.
1986 GasGas Halley restoration www.retrotrials.com
One thing is for sure....... I wont buy this type of junk resin again